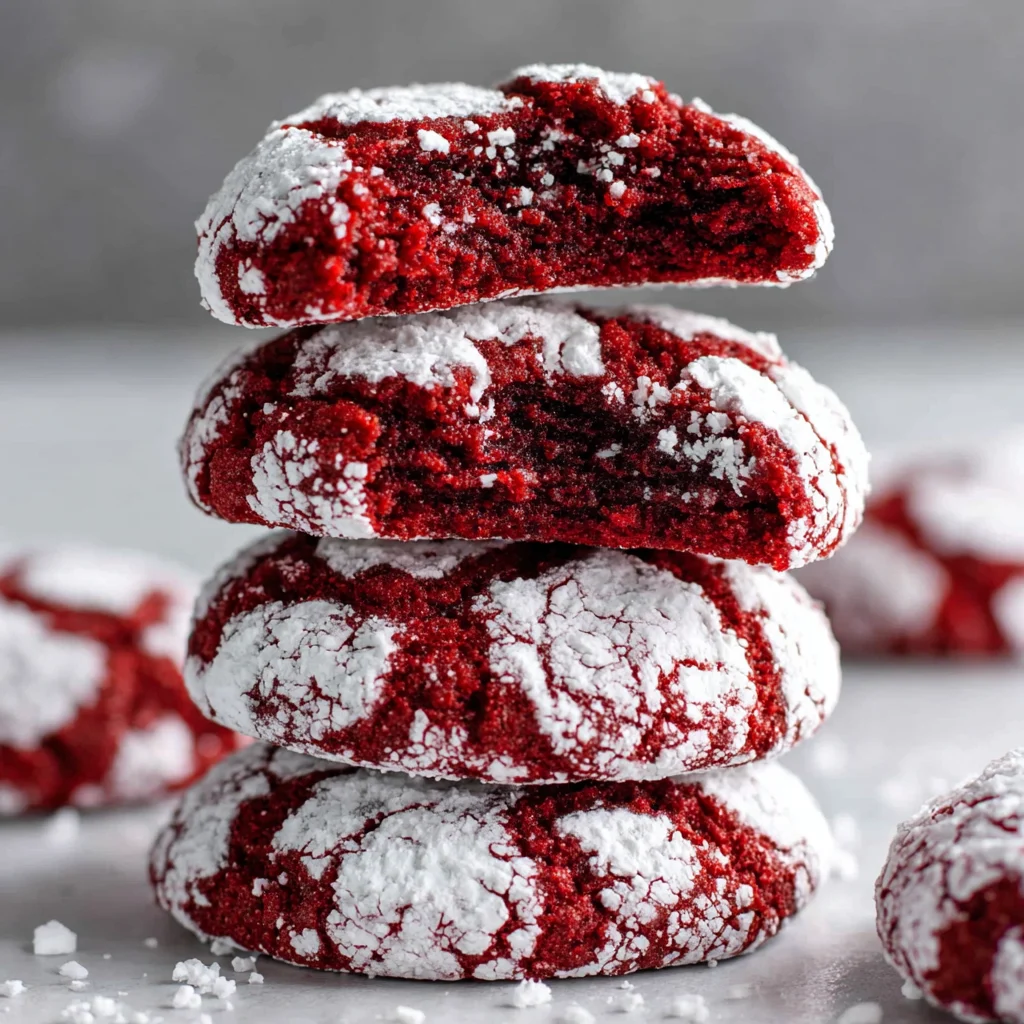
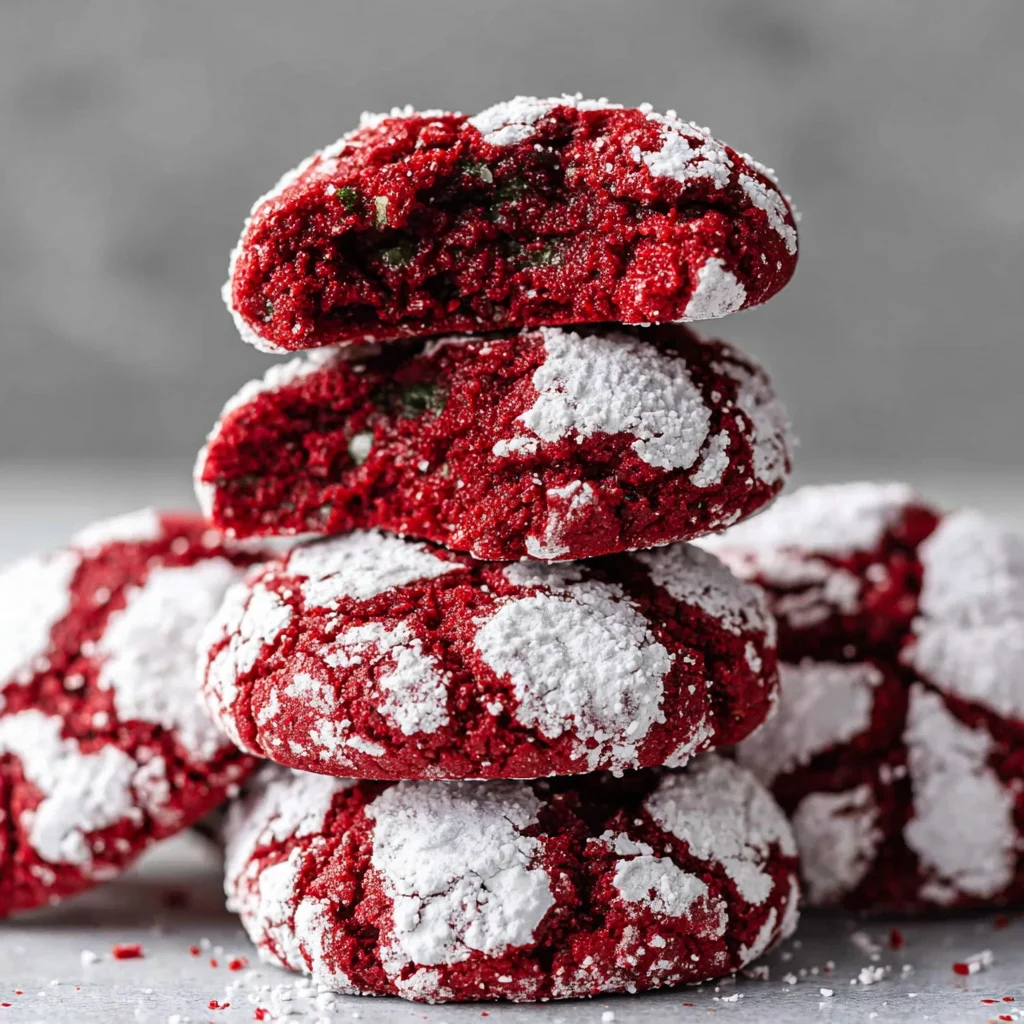
Red Velvet Crinkle Cookies bring together the beloved flavors of classic red velvet cake in a perfectly portable cookie form. These festive treats feature a soft, tender center with gorgeous cracked powdered sugar coating that creates an elegant snowflake effect your family will absolutely love during the holidays.
Ingredients
- 2 1/4 cups all-purpose flour
- 1/4 cup unsweetened cocoa powder
- 1 teaspoon baking soda
- 1/2 teaspoon salt
- 1/2 cup unsalted butter, softened
- 1 1/4 cups granulated sugar
- 2 large eggs
- 1/4 cup buttermilk
- 1 tablespoon red food coloring
- 1 teaspoon vanilla extract
- 1 teaspoon white vinegar
- 1 cup powdered sugar for rolling
Budget-Friendly Substitutions: Replace buttermilk with 1/4 cup regular milk plus 3/4 teaspoon lemon juice. Use gel food coloring instead of liquid for more vibrant color with less liquid. Substitute cream cheese extract for vanilla if you want that classic red velvet tang.
Timing
- Prep Time: 20 minutes
- Chill Time: 2 hours
- Bake Time: 12 minutes per batch
- Total Time: 3 hours
Family Tip: Mix the dough the night before and let it chill overnight. This saves time on busy baking days and actually improves the texture.
How to Make It
1. Prepare the Dry Ingredients
Whisk together flour, cocoa powder, baking soda, and salt in a medium bowl. The cocoa powder should be evenly distributed with no streaks remaining. This ensures every bite has that perfect chocolate undertone that makes red velvet special.
2. Cream Butter and Sugar
Beat softened butter and granulated sugar in a large bowl until light and fluffy, about 3-4 minutes. The mixture should look pale and increased in volume. This step creates the tender texture that sets these cookies apart from ordinary sugar cookies.
3. Add Wet Ingredients
Beat in eggs one at a time, then add buttermilk, red food coloring, vanilla, and vinegar. The dough should be bright red and smooth. Don’t worry if it looks vibrant – the color mellows beautifully during baking.
4. Combine and Chill
Gradually mix in the flour mixture until just combined. Cover the bowl with plastic wrap and refrigerate for at least 2 hours. Properly chilled dough holds its shape better and creates those perfect crinkled edges.
5. Shape and Coat
Preheat oven to 350°F. Roll chilled dough into 1.5-inch balls, then roll each ball generously in powdered sugar. Place on parchment-lined baking sheets, spacing them 2 inches apart.
6. Bake to Perfection
Bake for 10-12 minutes until edges are set but centers still look slightly soft. The cookies should have beautiful white cracks across deep red surfaces. Let cool on baking sheets for 5 minutes before transferring to wire racks.
Nutritional Information
Per cookie (makes about 36): Approximately 120 calories, 3g fat, 23g carbohydrates, 2g protein, and 85mg sodium. These treats offer a lighter alternative to frosted red velvet cake while delivering the same beloved flavor.
Serving Suggestions
Pair these festive cookies with cold milk for the kids or hot coffee for adults. They’re perfect alongside vanilla ice cream for an elegant dessert or packed in pretty tins as thoughtful holiday gifts for neighbors and teachers.
Common Mistakes to Avoid
Don’t skip the chilling step – warm dough spreads too much and won’t develop proper cracks. Avoid overbaking; these cookies continue cooking on the hot pan after removal. Roll generously in powdered sugar for the best visual impact. Finally, resist the urge to press down on the dough balls before baking, as this prevents the signature crinkled appearance from forming.
Storing Tips
Store cooled cookies in an airtight container at room temperature for up to one week. For longer storage, freeze in freezer bags for up to three months. These cookies taste amazing straight from room temperature storage and don’t require reheating.
Conclusion
This recipe transforms the elegant flavors of red velvet into perfect handheld treats your family will request again and again. The combination of visual appeal and comforting taste makes every batch feel like a celebration.
FAQs
Can I make these cookies less sweet for picky eaters?
Reduce the granulated sugar to 1 cup and use unsweetened cocoa powder. The buttermilk and vinegar provide subtle tang that balances sweetness naturally.
Why didn’t my cookies develop cracks?
This usually happens when the dough isn’t cold enough or when cookies are underbaked. Make sure to chill dough thoroughly and bake until edges are just set.
Can I use natural food coloring?
Yes, but natural red coloring often produces more pink results. Beet powder works well but may slightly alter the flavor. Gel coloring provides the most vibrant results with minimal liquid addition.
How do I prevent the powdered sugar from disappearing during baking?
Roll cookies in powdered sugar twice – once before the first chill, then again just before baking. This creates a thicker coating that maintains the white cracked appearance.
Can I double this recipe for large gatherings?
Absolutely! This recipe doubles beautifully. Just make sure your mixer can handle the larger batch, and consider chilling the dough in two separate bowls for easier handling.
Red Velvet Crinkle Cookies
Ingredients
Method
- Whisk together flour, cocoa powder, baking soda, and salt in a medium bowl. The cocoa powder should be evenly distributed with no streaks remaining.
- Beat softened butter and granulated sugar in a large bowl until light and fluffy, about 3-4 minutes. The mixture should look pale and increased in volume.
- Beat in eggs one at a time, then add buttermilk, red food coloring, vanilla, and vinegar. The dough should be bright red and smooth.
- Gradually mix in the flour mixture until just combined. Cover the bowl with plastic wrap and refrigerate for at least 2 hours.
- Preheat oven to 350°F. Roll chilled dough into 1.5-inch balls, then roll each ball generously in powdered sugar. Place on parchment-lined baking sheets, spacing them 2 inches apart.
- Bake for 10-12 minutes until edges are set but centers still look slightly soft. The cookies should have beautiful white cracks across deep red surfaces. Let cool on baking sheets for 5 minutes before transferring to wire racks.
Leave a Reply